
This guide documents the legacy process for including the nudge® mobile library in an iOS application for an implementation that does include the optional location-based messaging functionality add-on. The current premium guide for integration with location-based messaging can be found here.
Not sure if the integration you are building includes location-based messaging? Click Submit a request above, or contact us at support@larky.com!
Library version
As of this writing the latest library is
2.1.0
Requirements:
This guide assumes you're targeting iOS version 10 or above and that you have a valid nudge API key.
If you do not yet have a nudge API key, please contact support@larky.com with the following information:
- Your organization name
- To create an initial portal user we also need the following
- User first name
- User last name
- User email
- iOS APN information. Click here for details
- .p8 key
- Your Apple developer team ID
Before getting started, please make sure you are following those minimum requirements:
- XCode: version 13.4
- Cocoapods: version 1.11.2
Preparing your app
You'll need to change a few settings before being able to integrate nudge
Turn on your app's Push Notification and Background Location capabilities
This can be done by selecting your app's target in the file navigator of your Xcode project and then modifying the "Signing & Capabilities":
- Click on "+ Capability" and select "Push Notifications"
- Click on "+ Capability" and select "Background Modes" and
- Select Location updates
- Select Remote notifications
Importing the library
nudge is available through CocoaPods. First, install Cocoapods if you don't already have it. Then, to install nudge, follow these steps:
Adding the nudge pod to your project
Create a new Empty file called Podfile in the root of your xcodeproj directory
Add the following code to your Podfile
- Replace
<YOUR_APP_NAME>with the name of your app's target: - Replace
<LIB_VERSION_NUMBER>with the appropriate library version.
| Objective-C: |
target ' |
| Swift: |
source 'https://cdn.cocoapods.org/' |
Open a terminal window and go to the directory of your app
This is the directory that contains the YOUR_APP_NAME.xcodeproj file.
Run the following commands:
pod install
pod update
This should import the latest version of the library and create the necessary files for you. From here on out, you'll want to use the YOUR_APP_NAME.xcworkspace file instead of your usual .xcodeproj file. Quit Xcode and reopen your xcworkspacefile.
Add nudge to the file where you deal with/authenticate your users
| Objective-C: |
|
In #import <nudge/nudge-Swift.h>
|
| Swift: |
|
In import nudge
|
Integrating the nudge library with your code
First, add the following code near where you deal with/authenticate your users
| Objective-C: |
Nudge *myNudge = [[Nudge alloc] |
| Swift: |
var nudge: Nudge! |
Parameters:
- apiKey: Required - This is your Larky provided nudge API key
- enabled: Required - A boolean that should be set to true. This is a programmatic way of turning the nudge library on/off
- showLocationDialog: Optional - This is an optional boolean that triggers the display of a prominent disclosure dialog box providing context to the user about why the application is requesting access to background location, before that request is actually made to the OS. This is required by the Google Play store for all Android apps, and is best practice for all iOS apps. If you choose to disable the dialog, we highly recommend that in order to deliver the best overall user adoption, you provide one of your own in conditional code wrapped around the initialization line. We would be happy to discuss the details of this with you! Please contact support@larky.com for more information.
- federationId: ID value identifying the logged-in app user, enabling targeted messaging to account holders. See this article for more details, including suggested values to use for this parameter.
Now it's time to add the Nudge notification handlers to your AppDelegate
If you'd like, you can see the sample AppDelegate at the bottom of this doc or follow the next steps.
Add the import to the top of your AppDelegate file just like before
| Objective-C: |
|
AppDelegate.h #import <UIKit/UIKit.h>
#import <UserNotifications/UserNotifications.h>
@interface AppDelegate : UIResponder <UIApplicationDelegate,UNUserNotificationCenterDelegate>
@end
AppDelegate.m #import <nudge/nudge-Swift.h>
|
| Swift: |
|
AppDelegate.swift import nudge
@UIApplicationMain
class AppDelegate: UIResponder, UIApplicationDelegate {
}
|
Then, start by editing the didFinishLaunchingWithOptions method
Add the following nudge method to register your app to receive notifications:
| Objective-C: |
UNUserNotificationCenter *center = [UNUserNotificationCenter currentNotificationCenter]; center.delegate = self; [Nudge registerForPushNotificationsAndReturnError:nil]; [application registerForRemoteNotifications]; |
| Swift: |
UNUserNotificationCenter.current().delegate = self

try? Nudge.registerForPushNotifications()

application.registerForRemoteNotifications()
NOTE: this method is only available for iOS 10 or higher. If you'd like to handle the case where your user is below iOS 10, you can do so by catching the following error: UNUserNotificationCenter.current().delegate = self
do {
try Nudge.registerForPushNotifications()
} catch Nudge.NudgeErrors.unsupportediOSVersion {
print("Unsupported iOS version, please upgrade.")
} catch {
print("Unexpected error when trying to register for push notifications.")
}
application.registerForRemoteNotifications()
|
Next, we need to know when your app has finished registering
Add the entire following method towards the bottom of your AppDelegate class:
| Objective-C: |
- (void)application:(UIApplication *)application |
| Swift: |
func application(_ application: UIApplication, |
We also need to know in case anything goes wrong
Add this entire last method after the one you just added:
| Objective-C: |
- (void)application:(UIApplication *)application |
| Swift: |
func application(_ application: UIApplication,
     didFailToRegisterForRemoteNotificationsWithError error: Error) {
        Nudge.onFailedToRegisterForNotifications(error:error)
    }
|
Once users receive the push, we need to record some information about it and potentially redirect the user to see the correct content
Copy this next method under the one you just added:
| Objective-C: |
- (void)application:(UIApplication *)application |
| Swift: |
func application(
        _ application: UIApplication,
        didReceiveRemoteNotification userInfo: [AnyHashable: Any],
        fetchCompletionHandler completionHandler: @escaping (UIBackgroundFetchResult) -> Void) {
          Nudge.receivedPush(notificationPayload:userInfo, application: application)
    }
|
NOTE: If your app already has push notifications, you may want to only call the receivedPush function when a nudgenotification was sent. Here's what that looks like:
| Objective-C: |
NSString * isNudge = [userInfo objectForKey:@"isNudge"]; BOOL boolIsNudge = [isNudge boolValue]; if (boolIsNudge) { [Nudge receivedPushWithNotificationPayload:userInfo application:application]; } else { // Do application logic for your notifications here! } |
| Swift: |
if let isNudge = (userInfo["isNudge"] as! Bool) {
    Nudge.receivedPush(notificationPayload:userInfo, application: application)
} else {
    // Do application logic for your notifications here!
}
|
In order to handle notification tapping we need to add the following method(s)...
| Objective-C: |
...toward the bottom of your
|
| Swift: |
....after your
|
For additional details regarding handling push notification taps, please see this article.
Finally, we need to request location permissions from users!
This is an important step in not only requesting the appropriate permissions, but also explaining to the user why you are requesting that permission. The example text below can be used as a default; any changes to this text should be reviewed and approved by the client.
Add the following entries into your app's Info.plist file :
Privacy - Location When In Use Usage Description (NSLocationWhenInUseUsageDescription)
Default string:
Allow While Using App to take full advantage of personalized notifications for branch details, community events and possible fraud activity
Privacy - Location Always and When In Use Usage Description (NSLocationAlwaysAndWhenInUseUsageDescription)
Default string:
Please tap Always Allow to continue taking full advantage of personalized notifications for branch details, community events and possible fraud activity
Distributing your nudge-enabled app
Note that nudge requires your production app to be distributed via adhoc, enterprise, or distribution channels. Please contact us if your preliminary debug/testing app uses APNS sandbox mode so we can properly provision the environment on our side.
Follow these steps to create an adhoc build that you can test out for yourself:
- Make sure you've added your test device(s) to your apple developer account
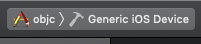
- Change your device target to Generic iOS Device
- Make sure to set
Build Settings>User-Defined->MTL_ENABLE_DEBUG_INFO->ReleaseasYES - From the top menu, click Product -> Clean, then Product -> Build
- Then, click Product -> Archive
- This should bring up the Archives window
- Click on your archive, then click Distribute App on the right side of the window.
- Choose "Ad Hoc", then click next
- Choose all of the default options from here
- Export the app to a folder on your computer
- Find the
.ipafile in that folder and distribute it so you can download it to your test device.- For this service, we like using diawi! They make it very simple to turn an
.ipainto a link that you can download.
- For this service, we like using diawi! They make it very simple to turn an
Download this app and open it up. Accept the permissions and you should be good to go! You can now send yourself notifications through your nudge dashboard! Next time you distribute your app, your users will be registered as soon as they update and open their app!
Sample AppDelegate
| Objective-C: |
//
// AppDelegate.m
// objectivec
//
// Copyright © 2022 Larky, Inc. All rights reserved.
//
#import "AppDelegate.h"
#import <nudge/nudge-Swift.h>
@interface AppDelegate ()
@end
@implementation AppDelegate
- (BOOL)application:(UIApplication *)application didFinishLaunchingWithOptions:(NSDictionary *)launchOptions {
// Override point for customization after application launch.
UNUserNotificationCenter *center = [UNUserNotificationCenter currentNotificationCenter];
center.delegate = self;
[Nudge registerForPushNotificationsAndReturnError:nil];
[application registerForRemoteNotifications];
return YES;
}
- (void)applicationWillResignActive:(UIApplication *)application {
// Sent when the application is about to move from active to inactive state.
|
| Swift: |
//
// AppDelegate.swift
// nudge
//
// Copyright (c) 2022 Larky, Inc. All rights reserved.
//
import UIKit
import nudge
@UIApplicationMain
class AppDelegate: UIResponder, UIApplicationDelegate {
var window: UIWindow?
func application(_ application: UIApplication,
didFinishLaunchingWithOptions launchOptions: [UIApplication.LaunchOptionsKey: Any]?) -> Bool {
// For iOS 10 display notification (sent via APNS)
UNUserNotificationCenter.current().delegate = self
do {
try Nudge.registerForPushNotifications()
} catch Nudge.NudgeErrors.unsupportediOSVersion {
print("Unsupported iOS version, please upgrade")
} catch {
print("Unexpected error, please contact support@larky.com")
}
application.registerForRemoteNotifications()
return true
}
func applicationWillResignActive(_ application: UIApplication) {
// Sent when the application is about to move from active to inactive state.
|
Sample ViewController.swift
//
//  ViewController.swift
//
import UIKit

import nudge


class ViewController: UIViewController {

    var apiKey: String = "<YOUR API KEY HERE>"
    var nudge: Nudge!
    var isNudgeEnabled: Bool = true

    override func viewDidLoad() {
        super.viewDidLoad()
        // Do any additional setup after loading the view.
        nudge = Nudge(options: [
                "apiKey": self.apiKey,
                "enabled": self.isNudgeEnabled,
                "showLocationDialog": true
            ]);
    }
}
Comments
0 comments
Article is closed for comments.